Les faucheurs de marguerites 02: Aéromodélisme en Picardie

Vous souhaitez réagir à ce message ? Créez un compte en quelques clics ou connectez-vous pour continuer.

La référence aéromodélisme en Picardie

-29%
Le deal à ne pas rater :
PC portable – MEDION 15,6″ FHD Intel i7 – 16 Go / 512Go (CDAV : ...
499.99 € 699.99 €
Voir le deal

    Un stampe SV 4 en construction

    JPV
    JPV
    Modérateur
    Modérateur


    Messages : 1424
    avions abattus : 1428
    Date d'inscription : 19/12/2009
    Age : 67
    Localisation : Tergnier

    Un stampe SV 4 en construction Empty Un stampe SV 4 en construction

    Message par JPV Jeu 26 Jan 2023 - 17:28

    Un avion que je rêve depuis longtemps de construire ! Mais hélas ce n'est pas le seul et je n'aurai sans doute plus le temps de tous les réaliser ! Un stampe SV 4 en construction 4258015104
    Avant toute chose la réalisation d'un plan est obligatoire ! Des côtes, des idées, des montages fiables seront à réaliser sur papier puis retranscrits sur le plan !Un stampe SV 4 en construction 2611293715  
    Un stampe SV 4 en construction Img_1666
    La réalisation sur ordinateur fait gagner du temps ! Un stampe SV 4 en construction 981361244
    Un stampe SV 4 en construction Img_1668
    Tout peu être réalisé à l'échelle 1, et les assemblages peuvent êtres vérifiés avant réalisation ! Un stampe SV 4 en construction 3369208113
    Un stampe SV 4 en construction Img_1667
    Les ailes seront réalisées en partie en bois et en polystyrène haute densité , pour des raisons de coût ! Un stampe SV 4 en construction 981361244
    Un stampe SV 4 en construction Img_1670
    Un tirage papier à l'échelle 1/2 pour les prises de côtes (je n'ai pas de traceur en A 0) donc je fais avec ce que j'ai ! Un stampe SV 4 en construction 3282021089
    Un stampe SV 4 en construction Img_1669
    Le profil NACA 2415 est tracé avec le remarquable logiciel Tracfoil qui me sert depuis de nombreuses années ! Un stampe SV 4 en construction 2611293715
    Un stampe SV 4 en construction Img_1671
    Ensuite les axes de construction sont reportés en vrai grandeurs sur le papier ! Un stampe SV 4 en construction 3369208113
    La construction Un stampe SV 4 en construction 981361244
    Un stampe SV 4 en construction Img_1674
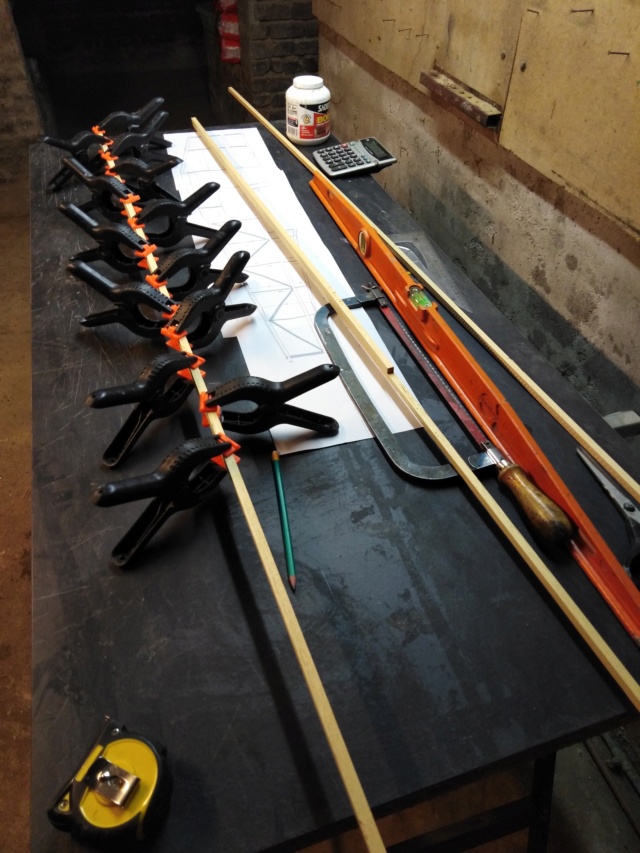
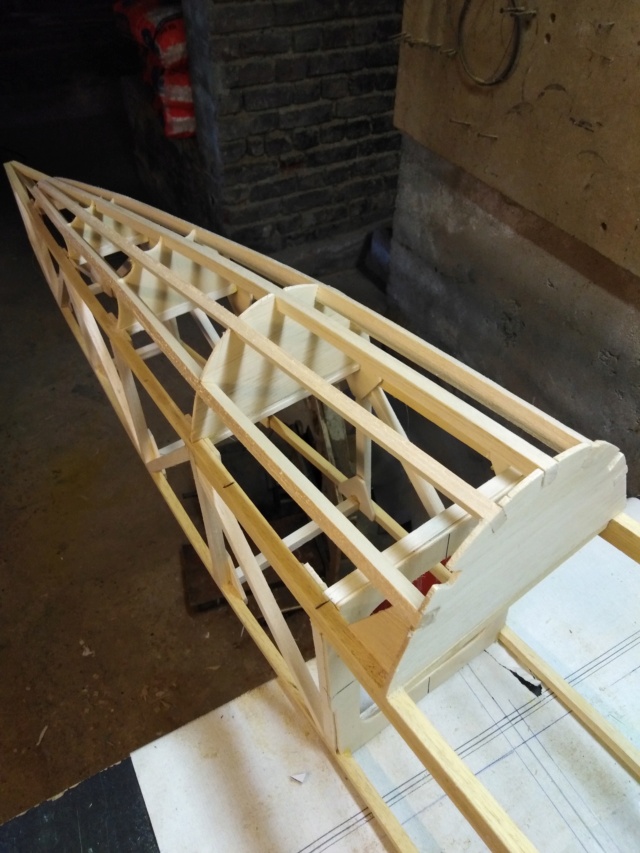
    Les longerons de fuselage sont préparés et encollé, le fuselage fera 1,65 m de long ! Un stampe SV 4 en construction 3282021089
    Un stampe SV 4 en construction Img_1672
    Quelques pièces seront découpées en avance sur du CTP de bouleau ordinaire, histoire de se rendre compte de visu !  Un stampe SV 4 en construction 2980765045
    Un stampe SV 4 en construction Img_1673
    Enfin la cabane et 2 fourreaux (support d'aile supérieure) seront réalisés à la suite ! Un stampe SV 4 en construction 981361244
    Un stampe SV 4 en construction Img_1677
    La partie avant (réservoir, batterie) est assemblée ! Un stampe SV 4 en construction 1512217045
    Un stampe SV 4 en construction Img_1676
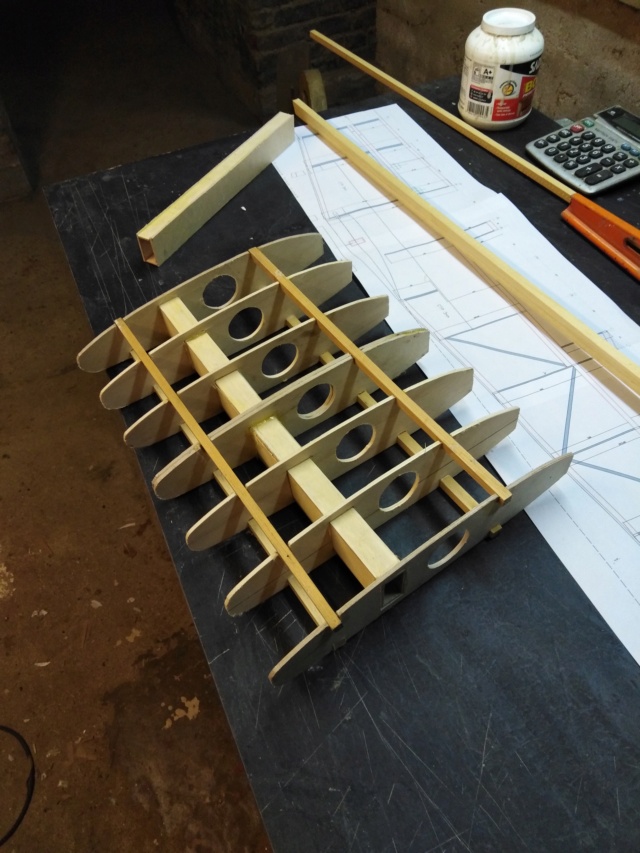
    Les flans sont collés (les couples ont été remplacés par des poutre en balsa de 10 mm dans un soucis de légèreté !) Un stampe SV 4 en construction 2611293715
    Un stampe SV 4 en construction Img_1675
    Enfin l'arrière du fuselage est construit en suivant les axes tracés !Un stampe SV 4 en construction 3369208113  
    Un stampe SV 4 en construction Img_1679
    Pose des goussets de renforts dans l'intérieur du fuselage ! Un stampe SV 4 en construction 2611293715
    Un stampe SV 4 en construction Img_1678
    Montage à blanc des couples avant ! Un stampe SV 4 en construction 981361244
    Un stampe SV 4 en construction Img_1680
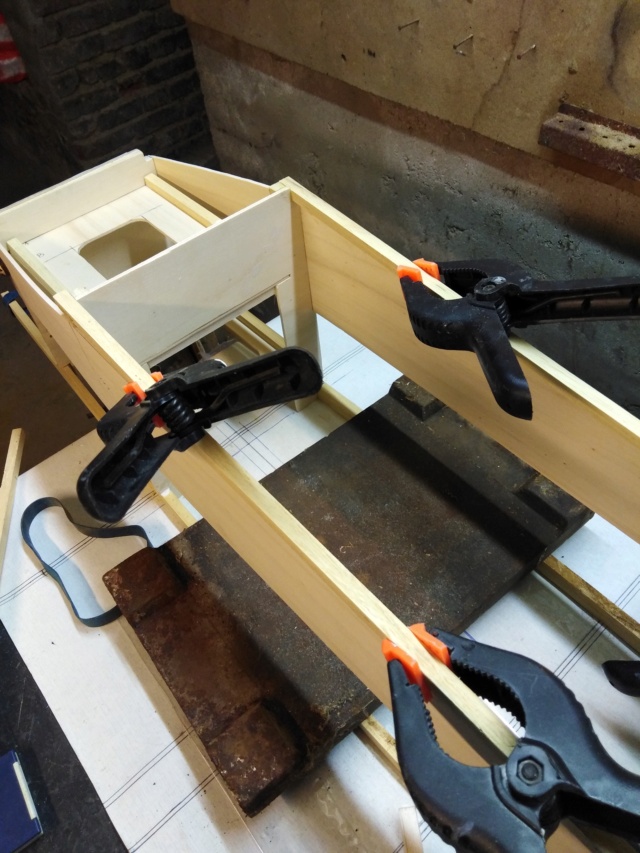
    Montage des flancs devant recevoir le fourreau d'aile inférieur ! Un stampe SV 4 en construction 2980765045
    Un stampe SV 4 en construction Img_1682

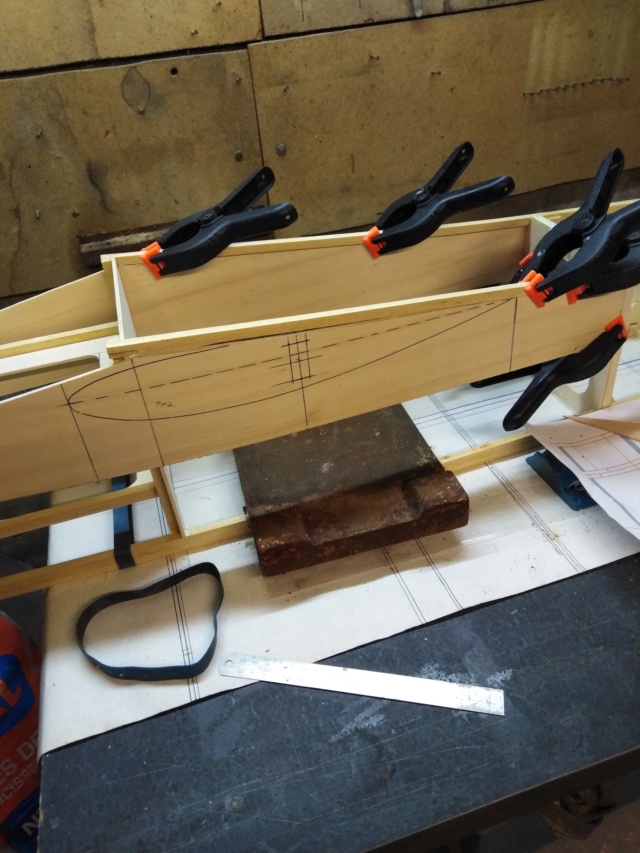
    Les flancs sont taillés dans du CTP bouleau ordinaire et seront doublés par du CTP de 3 mm aviation (Les flancs reçoivent le fourreau d'aile inférieure) Un stampe SV 4 en construction 2966747885
    Un stampe SV 4 en construction Img_1681
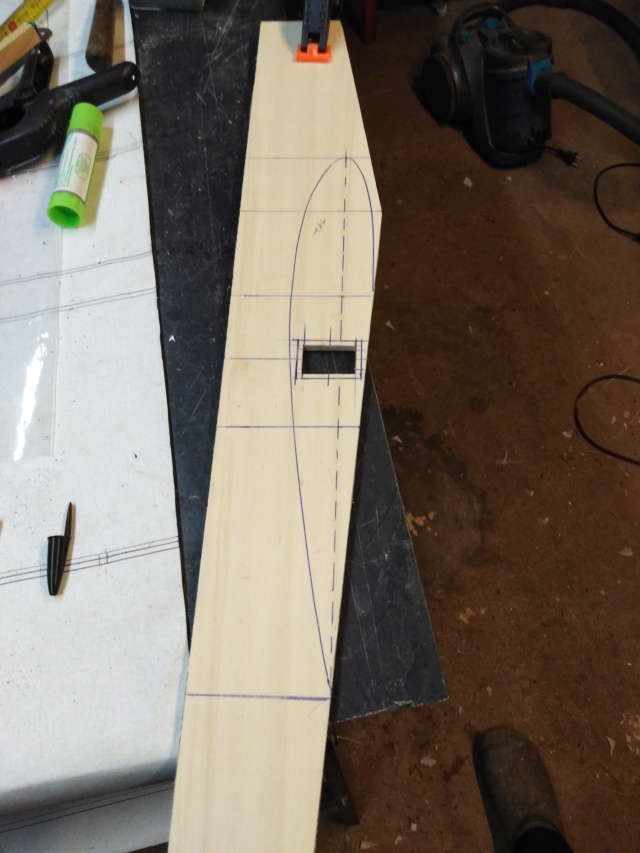
    Tracé de la nervure de 390 mm au profil NACA 2415  sur les flancs!  Un stampe SV 4 en construction 3369208113
    Un stampe SV 4 en construction Img_1683
    La position du fourreau est déterminé par le profil de l'aile en sa plus grande épaisseur ! Un stampe SV 4 en construction 1512217045
    Le reste pour demain si vous le voulez bien ! :respect:
    JPV
    JPV
    Modérateur
    Modérateur


    Messages : 1424
    avions abattus : 1428
    Date d'inscription : 19/12/2009
    Age : 67
    Localisation : Tergnier

    Un stampe SV 4 en construction Empty Re: Un stampe SV 4 en construction

    Message par JPV Ven 27 Jan 2023 - 17:29

    La suite est assez particulière ! Un stampe SV 4 en construction 1939595482
    Il faut intégrer au mieux le fourreau de clef d'aile à l’intérieur du fuselage, pour un montage plus rapide. De plus l'ensemble sera plus léger et d'une solidité à toute épreuve !Un stampe SV 4 en construction 2611293715
    Un stampe SV 4 en construction Img_1685
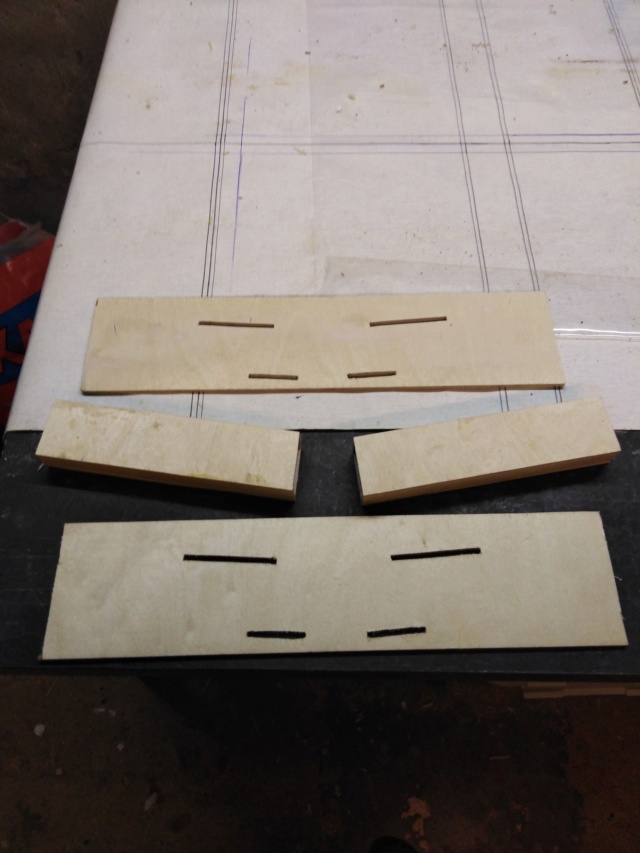
    Confection de 2 flancs en CTP multiplis de 3 mm rigoureusement identiques, sur lesquels on pratique des encoches de clavetage ! Un stampe SV 4 en construction 2611293715
    Un stampe SV 4 en construction Img_1686
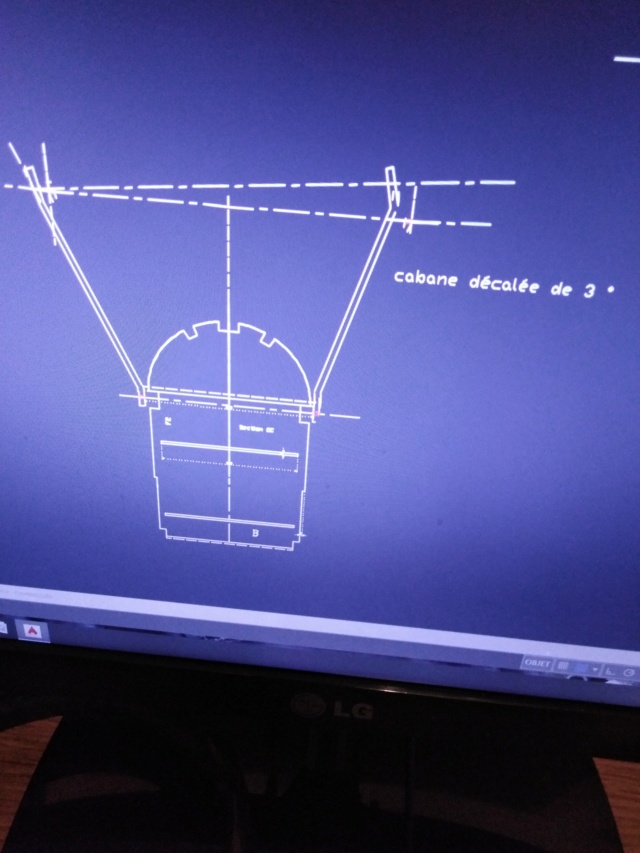
    Le fourreau ou se loge la clef d'aile est fabriqué en CTP aviation de 2 mm. Il est en 2 parties distincte rassemblées et formant un angle de 3° (dièdre de l'aile) Un stampe SV 4 en construction 3369208113
    Un stampe SV 4 en construction Img_1684
    Le fourreau est collé puis claveté par 4 partie en CTP multiplis .
    Un stampe SV 4 en construction Img_1689
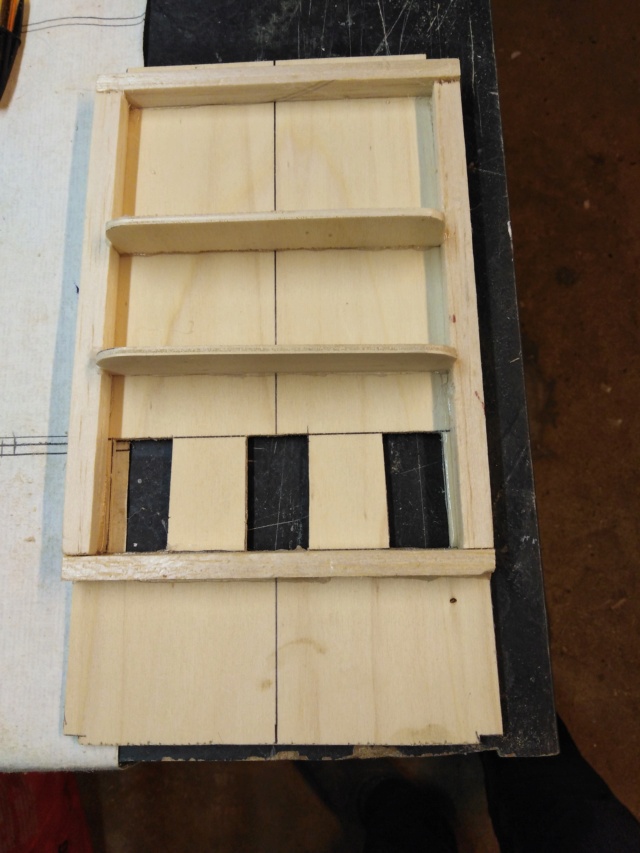
    Les 2 flancs enserrant le fourreau sont fermés et collés ! Un stampe SV 4 en construction 2980765045
    Un stampe SV 4 en construction Img_1688
    Vue de dessus au montage ! Un stampe SV 4 en construction 1512217045
    Un stampe SV 4 en construction Img_1687
    Collage serrage et séchage impératif ! Un stampe SV 4 en construction 3369208113
    Un stampe SV 4 en construction Img_1690
    Les flancs de fuselage sont préparés pour recevoir le fourreau et renforcés ! Un stampe SV 4 en construction 1512217045
    Un stampe SV 4 en construction Img_1691
    Un montage est réalisé à blanc pour vérifier les côtes ! Un stampe SV 4 en construction 3369208113
    Un stampe SV 4 en construction Img_1692
    L'ensemble est très solide et pourra résister à 7 ou 8 G du moins je l'espère ! Un stampe SV 4 en construction 1900122996
    Pour le reste on verra demain ! Un stampe SV 4 en construction 1900122996
    JPV
    JPV
    Modérateur
    Modérateur


    Messages : 1424
    avions abattus : 1428
    Date d'inscription : 19/12/2009
    Age : 67
    Localisation : Tergnier

    Un stampe SV 4 en construction Empty Re: Un stampe SV 4 en construction

    Message par JPV Dim 29 Jan 2023 - 16:22

    La sécurité dans les collages ! Un stampe SV 4 en construction 3833087828
    C'est vrai que si c'est bien collé, normalement pas de risque, mais.......l'humidité, la vieillesse, la chaleur ont vite fait de dégrader les collages !Et comme je ne suis pas devin, je ne prends pas de risques surtout pour quelques grammes en plus !   Un stampe SV 4 en construction 4258015104
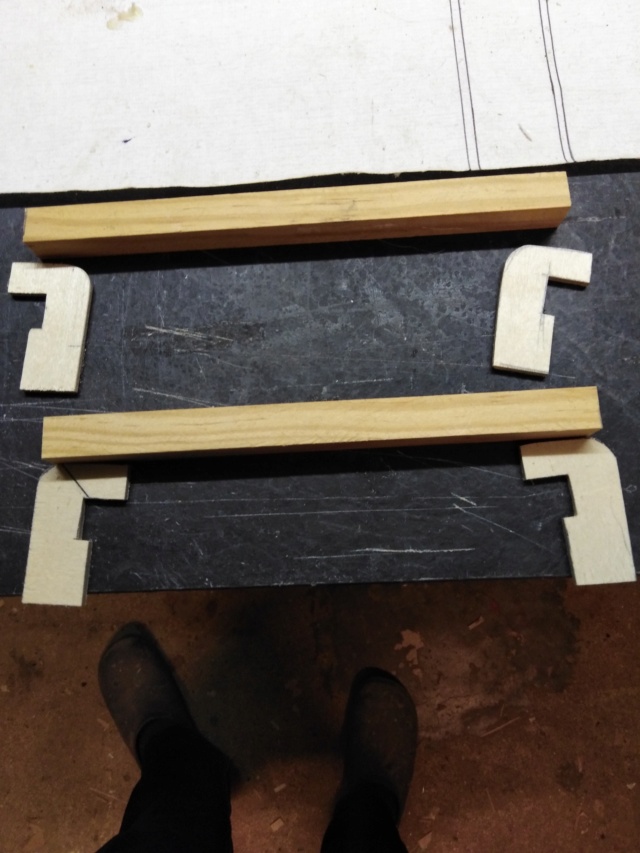
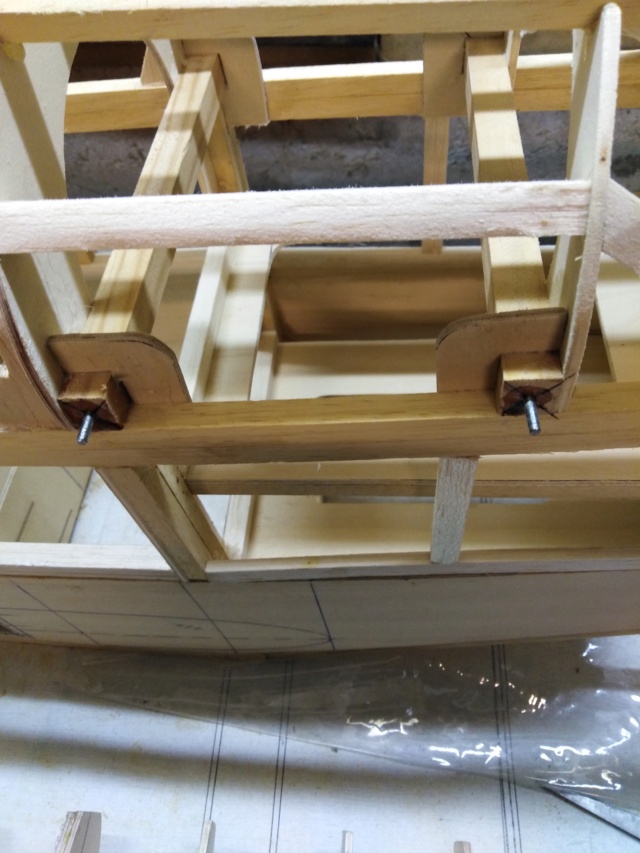
    J'ai donc opté pour des crochets supplémentaires sur les poutres porteuses de la cabane de l'avion ! Un stampe SV 4 en construction 2611293715
    Un stampe SV 4 en construction Img_1693
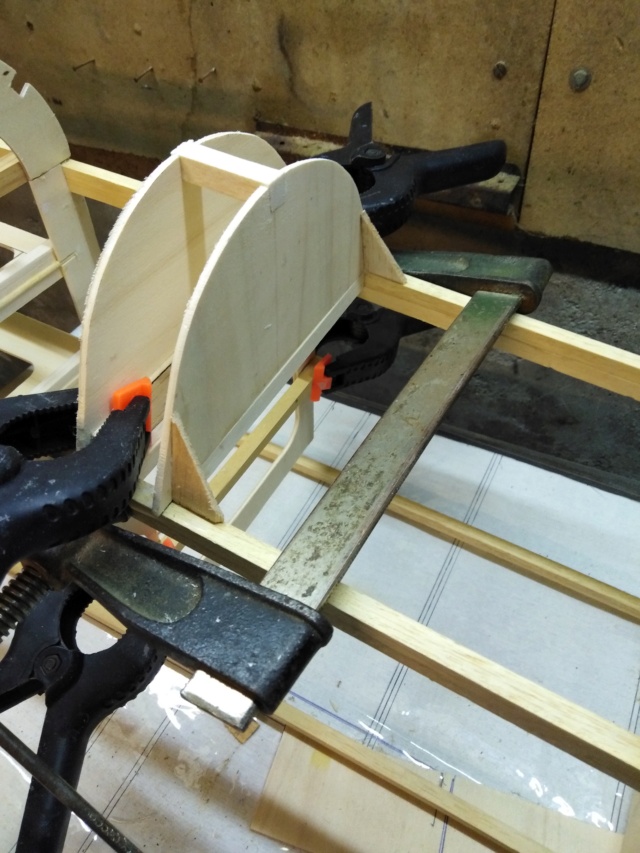
    Les 2 poutres supportent la cabane qui est vissée par les montants. Les 2 crochets sont fabriqués dans du CTP multiplis de 3 mm, puis collés ! Un stampe SV 4 en construction 2611293715
    Un stampe SV 4 en construction Img_1694
    Collés puis serrés à demeure ! Un stampe SV 4 en construction 981361244

    Un stampe SV 4 en construction Img_1695
    Les collages sont secs ! Un stampe SV 4 en construction 3369208113
    Le reste demain ! Un stampe SV 4 en construction 1900122996
    JPV
    JPV
    Modérateur
    Modérateur


    Messages : 1424
    avions abattus : 1428
    Date d'inscription : 19/12/2009
    Age : 67
    Localisation : Tergnier

    Un stampe SV 4 en construction Empty Re: Un stampe SV 4 en construction

    Message par JPV Lun 30 Jan 2023 - 17:32

    Au final si l'on respecte toujours le plan il n'y a pas de problème ! Un stampe SV 4 en construction 2611293715
    Mais pour moi, je trouve toujours une solution plus pratique (des fois !) Un stampe SV 4 en construction 4258015104
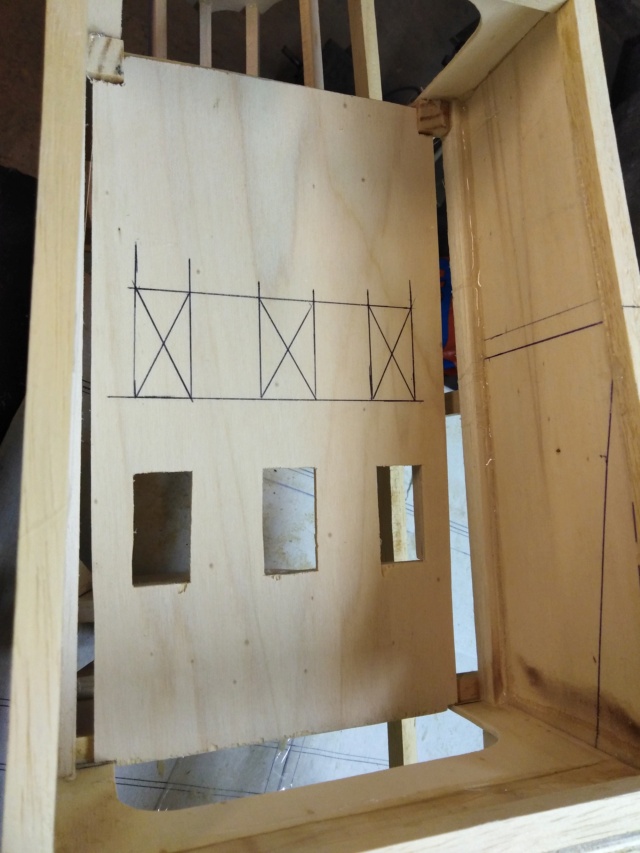
    Pour cette fois se sera la platine servos que est rendue démontable par son extraction du fuselage ! On peut la modifier à l'établi, munis de ses servos montés !
    Un stampe SV 4 en construction Img_1696
    Elle est posée brute ici ! Un stampe SV 4 en construction 2611293715
    Un stampe SV 4 en construction Img_1698
    Des renforts sont posés ! Un stampe SV 4 en construction 981361244
    Un stampe SV 4 en construction Img_1699
    Une trappe amovoble est prévue sous le dessous du fuselage pour extraire la platine servos ! Un stampe SV 4 en construction 3369208113
    Un stampe SV 4 en construction Img_1697
    Montage des raidisseurs sur les couples supérieurs ! Un stampe SV 4 en construction 1512217045
    Un stampe SV 4 en construction Img_1702
    Le fuselage fait 1,65 m et c'est grand ! Un stampe SV 4 en construction 1512217045
    Un stampe SV 4 en construction Img_1700
    Les couples supérieurs du poste de pilotage sont renforcés par de petites equerres en balsa de 3 mm! Un stampe SV 4 en construction 981361244
    Un stampe SV 4 en construction Img_1701
    Découpe des couples supérieurs arrières ! Un stampe SV 4 en construction 3369208113
    Le reste demain Un stampe SV 4 en construction 1900122996
    JPV
    JPV
    Modérateur
    Modérateur


    Messages : 1424
    avions abattus : 1428
    Date d'inscription : 19/12/2009
    Age : 67
    Localisation : Tergnier

    Un stampe SV 4 en construction Empty Re: Un stampe SV 4 en construction

    Message par JPV Mar 31 Jan 2023 - 17:44

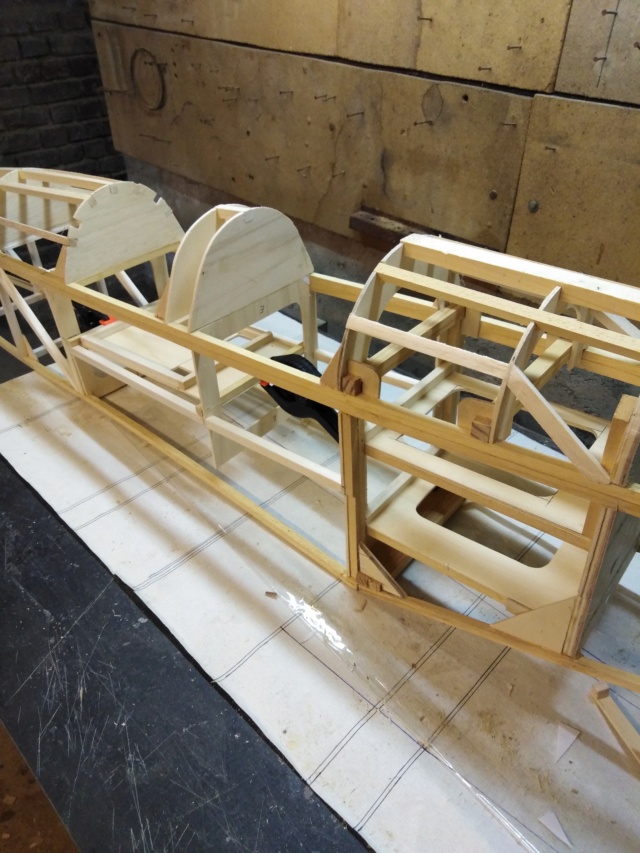
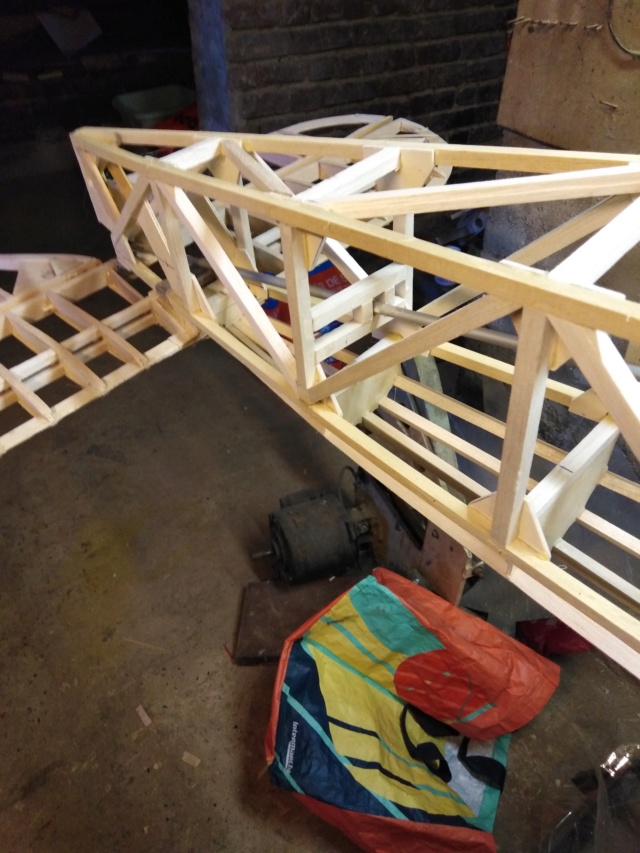
    L'ossature est presque terminée ! Un stampe SV 4 en construction 3369208113
    Un stampe SV 4 en construction Img_1703
    Le fuselage, la cabane, et la clef d'aile enserrée ! Un stampe SV 4 en construction 3369208113
    Dans le détail ! Un stampe SV 4 en construction 3833087828
    Un stampe SV 4 en construction Img_1706
    La platine servos  est amovible ! Un stampe SV 4 en construction 2611293715
    Un stampe SV 4 en construction Img_1705
    La platine servos est renforcée  ! Un stampe SV 4 en construction 2611293715
    Un stampe SV 4 en construction Img_1704
    Les flancs en CTP sont posés et le fourreau de clef d'aile inséré !Un stampe SV 4 en construction 1512217045  
    Un stampe SV 4 en construction Img_1709
    Le fourreau de clef d'aile vu par le dessous ! Un stampe SV 4 en construction 981361244
    Un stampe SV 4 en construction Img_1708
    Vue de dessus ! Un stampe SV 4 en construction 1512217045
    Un stampe SV 4 en construction Img_1707
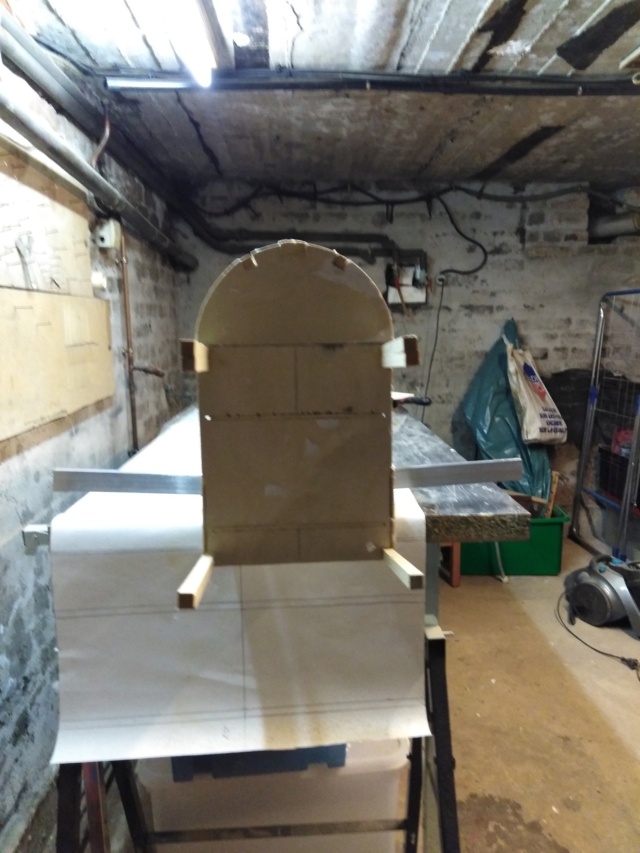
    Vue de la cloison pare feu,la clef d'aile insérée forme un angle de 3° Un stampe SV 4 en construction 981361244
    JPV
    JPV
    Modérateur
    Modérateur


    Messages : 1424
    avions abattus : 1428
    Date d'inscription : 19/12/2009
    Age : 67
    Localisation : Tergnier

    Un stampe SV 4 en construction Empty Re: Un stampe SV 4 en construction

    Message par JPV Ven 3 Fév 2023 - 17:18

    Montage provisoire de la cabane Un stampe SV 4 en construction 2611293715
    Un stampe SV 4 en construction Img_1710
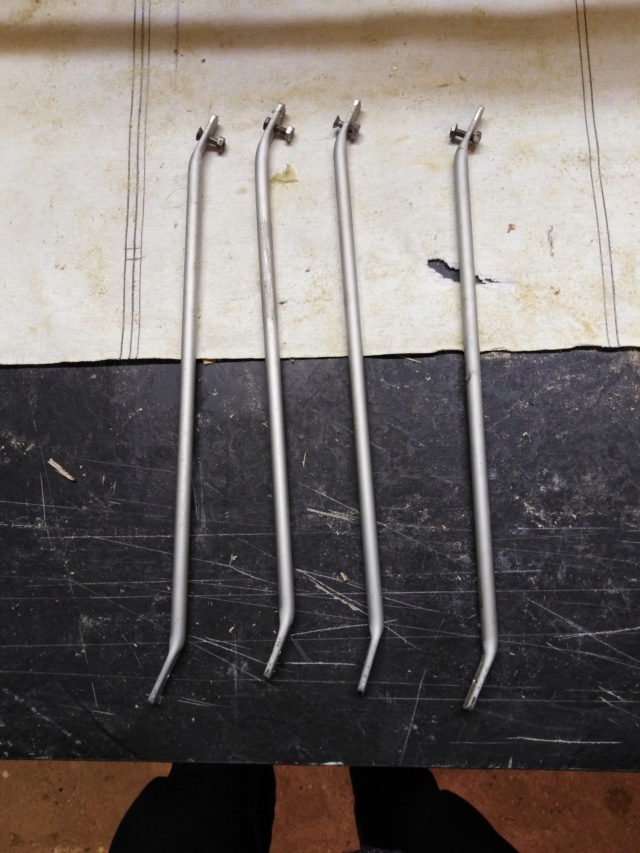
    Les haubans sont pliés et percés suivant un gabarit ! Un stampe SV 4 en construction 3369208113
    Un stampe SV 4 en construction Img_1711
    Les ferrures de fixation sont confectionnées dans de l'alu de 3 mm Un stampe SV 4 en construction 981361244
    Un stampe SV 4 en construction Img_1712
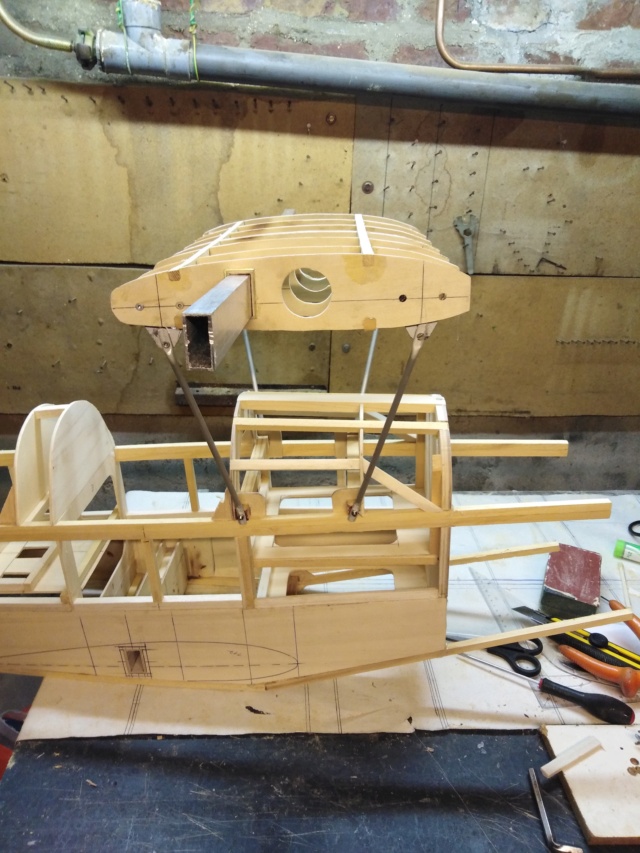
    Les haubans montés provisoirement sur la cabane ! Un stampe SV 4 en construction 1512217045
    Un stampe SV 4 en construction Img_1715
    Les fixations sont réalisées dans de la tige fileté de 3 mm Un stampe SV 4 en construction 3369208113
    Un stampe SV 4 en construction Img_1713
    L'ensemble est monté sur le fuselage sans réglage d'incidence ! Un stampe SV 4 en construction 3833087828
    Un stampe SV 4 en construction Img_1714
    Autre vue  Un stampe SV 4 en construction 1090871961
    Un stampe SV 4 en construction Img_1716
    Il ne restera plus qu'a caler  la cabane, une opération pas si simple à réaliser ! Un stampe SV 4 en construction 981361244  
    JPV
    JPV
    Modérateur
    Modérateur


    Messages : 1424
    avions abattus : 1428
    Date d'inscription : 19/12/2009
    Age : 67
    Localisation : Tergnier

    Un stampe SV 4 en construction Empty Re: Un stampe SV 4 en construction

    Message par JPV Sam 4 Fév 2023 - 9:00

    Le calage de la cabane ! Un stampe SV 4 en construction 3282021089
    Plus facile à faire qu'a expliquer dans des termes simples ! Un stampe SV 4 en construction 3833087828
    Pour ceux qui ont déjà effectué  du traçage en l'air, cela va paraitre simple! Un stampe SV 4 en construction 2611293715
    Pour les autres cela va être un peu plus complexe !Ce qu'il déterminer avant tout chose c'est une surface de référence qui servira  de base pour prendre toutes  les côtes possible,
    ou déterminer les angles de calage  !Un stampe SV 4 en construction 981361244  
    On peu prendre l'axe de vol , l'axe moteur, la corde d'une aile, la position d'un stabilisateur ..... Un stampe SV 4 en construction 4258015104
    Un stampe SV 4 en construction Img_1717
    Ici on va se servir de la base ou se fixera le stabilisateur ! Un stampe SV 4 en construction 1512217045
    Un stampe SV 4 en construction Img_1719
    Calage du fuselage au niveau à bulle !Toutes le références seront prises à partir de ce calage ! Un stampe SV 4 en construction 981361244  

    Un stampe SV 4 en construction Img_1720
    Ici on vérifie que le fuselage n'est pas vrillé par rapport au calage précédent ! Un stampe SV 4 en construction 2611293715

    Un stampe SV 4 en construction Img_1718
    On peut aussi utiliser la corde de l'aile comme référence qui sera parallèle au stab et au fuselage ! Un stampe SV 4 en construction 3369208113
    Un stampe SV 4 en construction Img_1722
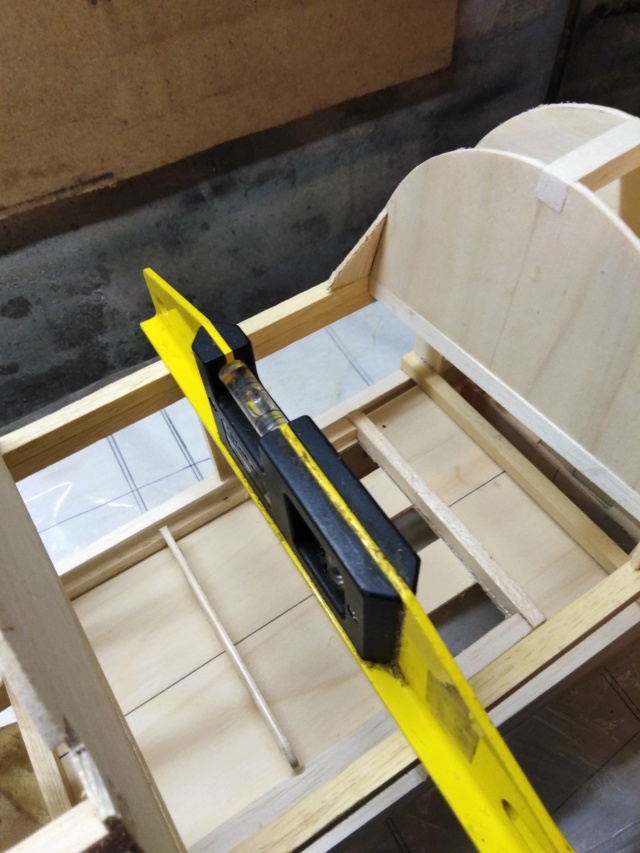
    Pour vérifier l'incidence de la cabane (qui doit être à 0°) on pose sur le tracage de la corde de l'aile une cale et un niveau ! Un stampe SV 4 en construction 981361244
    Un stampe SV 4 en construction Img_1723
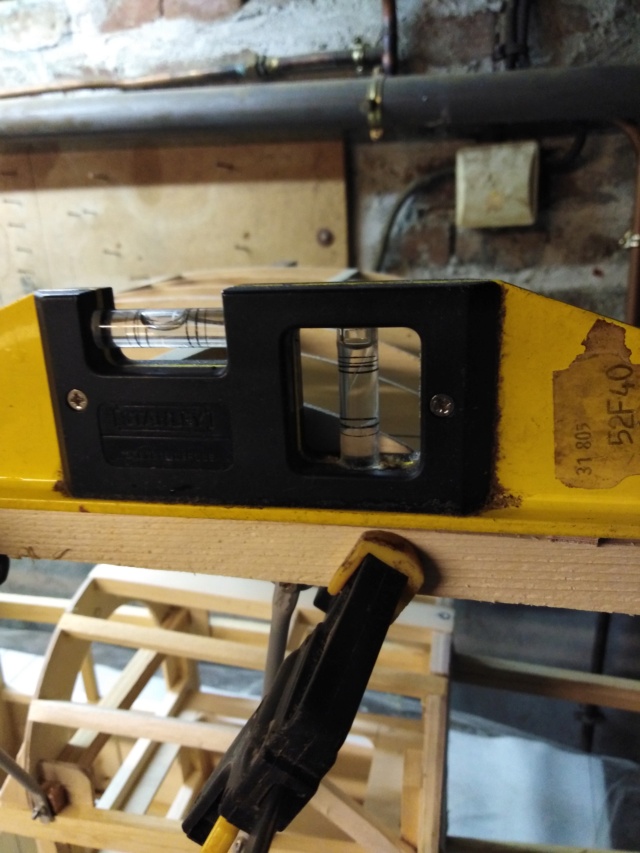
    Le niveau indique 0° de calage  Un stampe SV 4 en construction 2611293715
    Un stampe SV 4 en construction Img_1721
    A condition d'introduire une cale de 3 mm sous le niveau ; Cela indique que la cabane à un angle piqueur de 1/2 ° voir un peu plus ! Il faudra don rectifier ! Un stampe SV 4 en construction 1512217045
    Un stampe SV 4 en construction Img_1725
    Même principe pour vérifier le // de la cabane par rapport au fuselage !J'utilise la corde de l'aile comme référence ! Un stampe SV 4 en construction 981361244
    Un stampe SV 4 en construction Img_1726
    On voit la cale qui suit la corde de l'aile ! Un stampe SV 4 en construction 3369208113
    Un stampe SV 4 en construction Img_1724
    Le niveau indique 0° signe que la cabane est // Un stampe SV 4 en construction 2611293715
    Un stampe SV 4 en construction Img_1727
    Sauf que pour obtenir ce résulta , il a fallu interposer une cale de 3 mm sous le niveau à bulle  Un stampe SV 4 en construction 1512217045
    Un stampe SV 4 en construction Img_1728
    En gros le décalage du // est au minimum de 13 mm par rapport au fuselage et au stabilisateur ! Un stampe SV 4 en construction 4258015104
    Une grosse rectification s'impose ! Un stampe SV 4 en construction 2611293715
    JPV
    JPV
    Modérateur
    Modérateur


    Messages : 1424
    avions abattus : 1428
    Date d'inscription : 19/12/2009
    Age : 67
    Localisation : Tergnier

    Un stampe SV 4 en construction Empty Re: Un stampe SV 4 en construction

    Message par JPV Lun 6 Fév 2023 - 16:36

    Pour ce qui est du calage tout a été rectifié et vérifié Un stampe SV 4 en construction 3369208113  
    Un stampe SV 4 en construction Img_1729
    Une fois le parallélisme vérifié, contrôler le positionnement parfait du centrage au fil à plomb ! Un stampe SV 4 en construction 3833087828  
    Le montage des croisillons de renfort n'est pas une sinécure !  Un stampe SV 4 en construction 3282021089
    Un stampe SV 4 en construction Img_1731
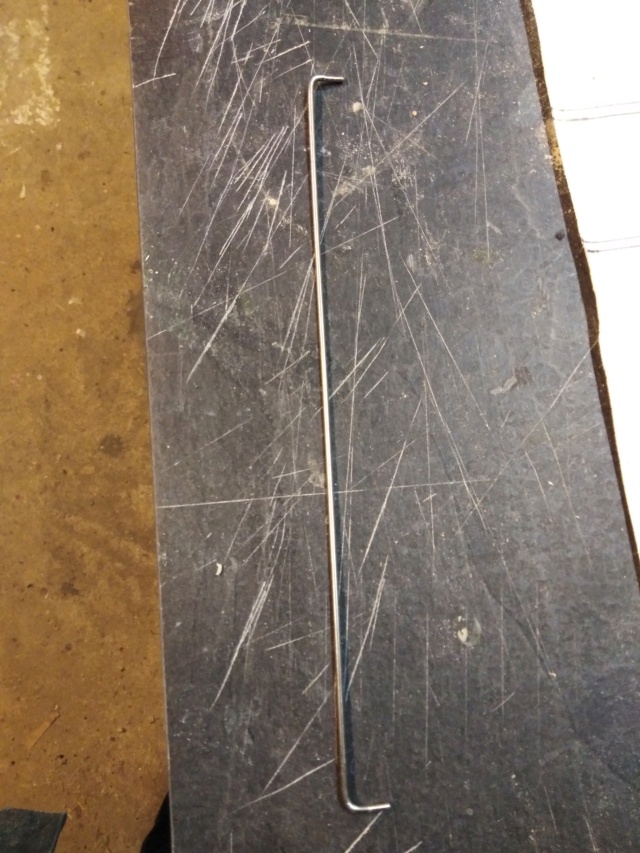
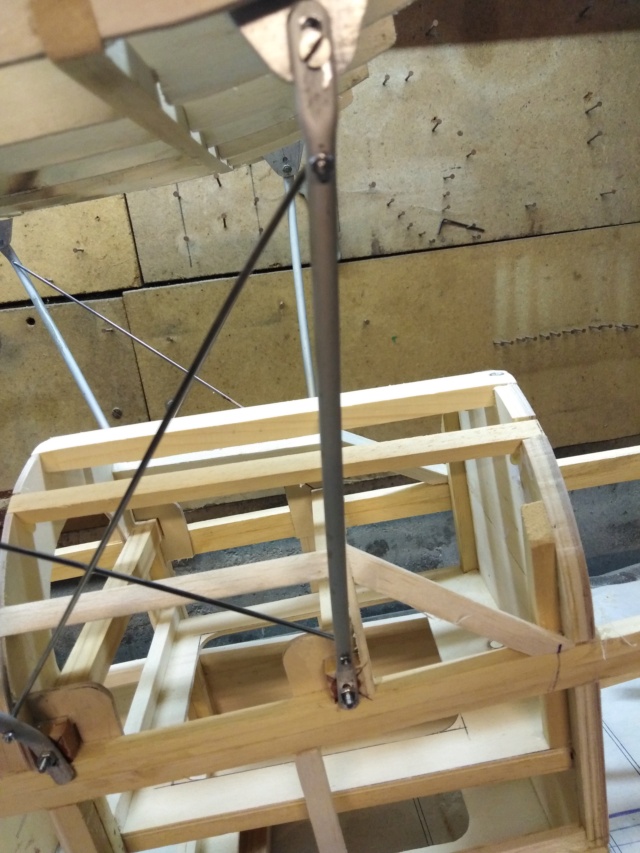
    Les croisillons sont confectionnés sur la base de baguettes inox à souder, qu'il faut plier et fileter à chaque bout ! L'opération nécessite de nombreux et fastidieux montage et démontage ! Un stampe SV 4 en construction 3282021089  
    Un stampe SV 4 en construction Img_1732
    Chaque tubes supports de cabane est percé au diamètre 2 mm pour l'insertion des croisillon ! Un stampe SV 4 en construction 2611293715
    Un stampe SV 4 en construction Img_1730
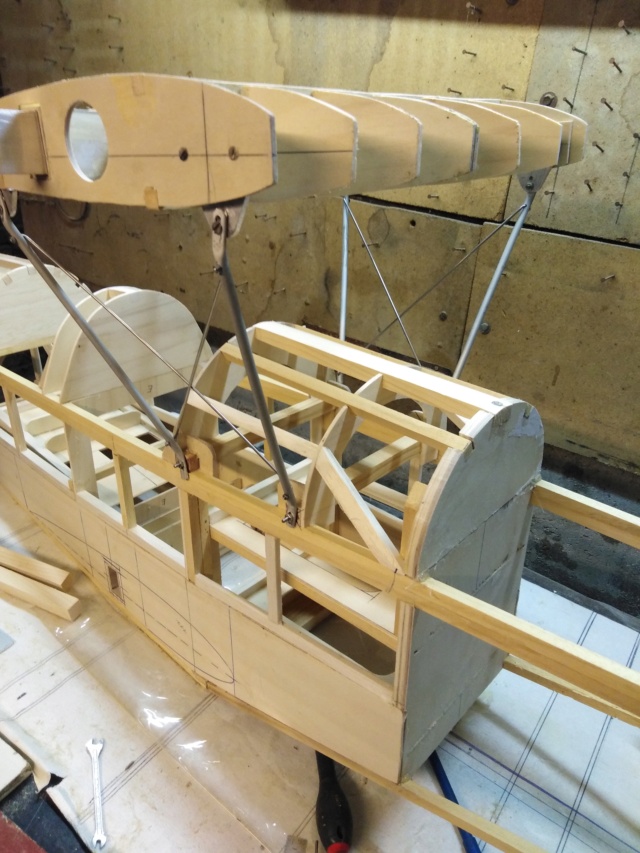
    Le montage donne une rigidité particulière à la cabane  ! Un stampe SV 4 en construction 2611293715
    Et c'est pas fini ! Un stampe SV 4 en construction 1512217045
    Un stampe SV 4 en construction Img_1735
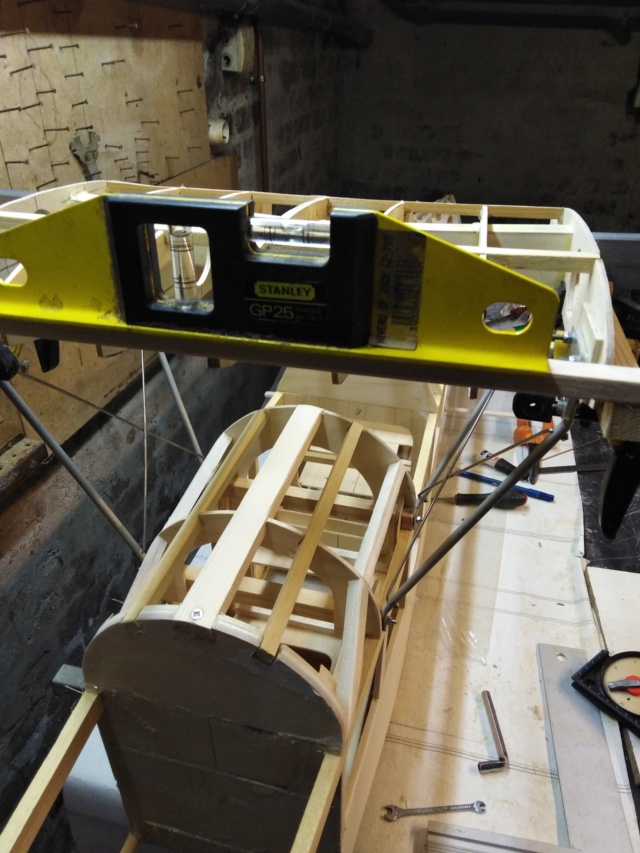
    Il faut une nouvelle fois vérifier l'incidence !(tout a peut être bougé  Un stampe SV 4 en construction 3282021089 )

    Un stampe SV 4 en construction Img_1734
    Le parallélisme est aussi à contrôler ! Un stampe SV 4 en construction 1512217045
    Un stampe SV 4 en construction Img_1733
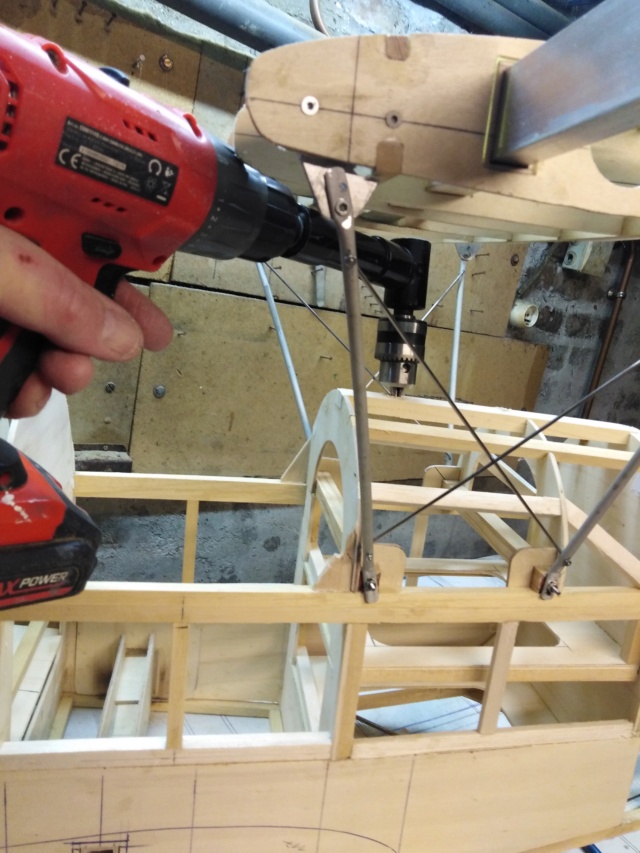
    Il faut aussi parfois utiliser des outils particulier ! Un stampe SV 4 en construction 1090871961
    Un stampe SV 4 en construction Img_1737
    Pour percer dans des coins improbables ! Un stampe SV 4 en construction 2966747885
    Un stampe SV 4 en construction Img_1738
    Juste pour installer les autres tirants qui rigidifient l’ensemble ! Un stampe SV 4 en construction 3369208113  
    Un stampe SV 4 en construction Img_1736
    Un contrôle visuel permet de se rendre compte si le travail est bien fait  Un stampe SV 4 en construction 3812654316  
    Un stampe SV 4 en construction Img_1739
    Mais il faut aussi valider ce que l'on pense être bien fait ! Un stampe SV 4 en construction 3369208113
    Et le pire dans l'affaire, c'est qu'il faut tout re démonter pour capoter l'ensemble  avec du balsa ! Un stampe SV 4 en construction 3282021089
    Un stampe SV 4 en construction 1900122996
    JPV
    JPV
    Modérateur
    Modérateur


    Messages : 1424
    avions abattus : 1428
    Date d'inscription : 19/12/2009
    Age : 67
    Localisation : Tergnier

    Un stampe SV 4 en construction Empty Re: Un stampe SV 4 en construction

    Message par JPV Jeu 9 Fév 2023 - 17:49

    Mais parfois une simple vérification vue par le dessus fait que tout ce que vous avez fait est à refaire ! Un stampe SV 4 en construction 2966747885
    Le fuselage posé à terre juste pour nettoyer le plan  de travail , m'a fait découvrir le désaxage de la cabane par rapport à la cloison pare feu ! Certes il 'y avait que très peu, mais sur 1250mm de longueur
    de l'aile c'est énorme !
    Un stampe SV 4 en construction 3282021089
    J'ai donc tout refait ! Un stampe SV 4 en construction 1512217045
    Un stampe SV 4 en construction Img_1740
    Les raidisseurs ont été modifiés et standardisés ! Un stampe SV 4 en construction 2611293715
    Un stampe SV 4 en construction Img_1743
    Des piges ont été introduites dans les fixations des haubans ! Un stampe SV 4 en construction 1512217045
    Un stampe SV 4 en construction Img_1741
    Des ferrures de maintien plus solides ont été posée ! Un stampe SV 4 en construction 2611293715
    Un stampe SV 4 en construction Img_1742
    Les piges ont servies au calage, et au respect des côte ! Un stampe SV 4 en construction 3833087828
    Un stampe SV 4 en construction Img_1746
    La côte 195 mm est respectée, même en cas de démontage de la cabane.  Un stampe SV 4 en construction 3369208113
    Un stampe SV 4 en construction Img_1744
    Les raidisseurs sont tous montés et indéréglables , ce qui rend la cabane indéformable ! Un stampe SV 4 en construction 3369208113
    Un stampe SV 4 en construction Img_1745
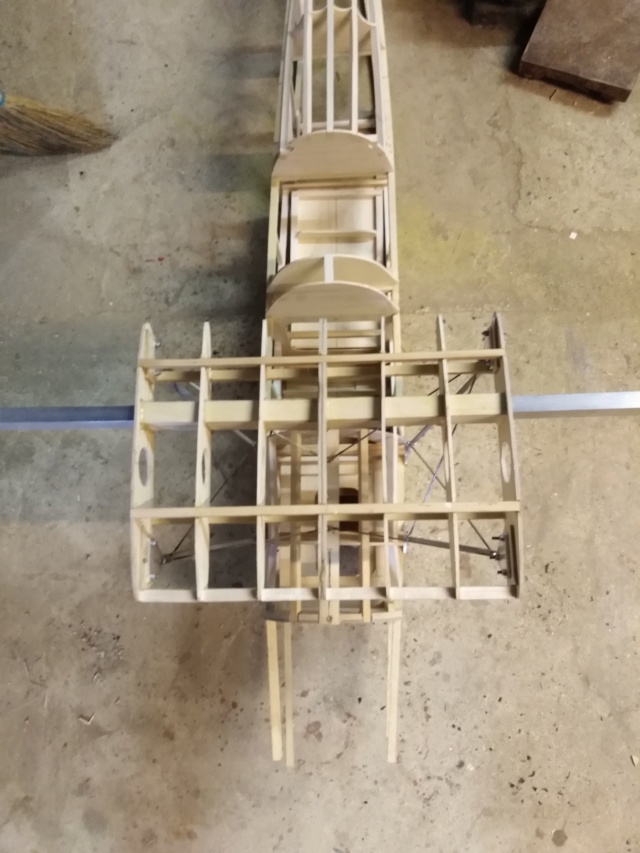
    Une vue de dessus valide le bon alignement de l'ensemble ! Un stampe SV 4 en construction 1900122996

    pierre aime ce message

    JPV
    JPV
    Modérateur
    Modérateur


    Messages : 1424
    avions abattus : 1428
    Date d'inscription : 19/12/2009
    Age : 67
    Localisation : Tergnier

    Un stampe SV 4 en construction Empty Re: Un stampe SV 4 en construction

    Message par JPV Ven 10 Fév 2023 - 17:12

    Le stabilisateur Un stampe SV 4 en construction 1512217045
    Une belle pièce de 0,83 m de longueur  Un stampe SV 4 en construction 981361244
    Un stampe SV 4 en construction Img_1747
    Sorti en format A 4 , assemblé puis collé juste pour avoir une petite idée de l'engin ! Un stampe SV 4 en construction 2966747885
    Un stampe SV 4 en construction Img_1748
    0, 83 mètres , ça en impose ! Un stampe SV 4 en construction 3282021089
    JPV
    JPV
    Modérateur
    Modérateur


    Messages : 1424
    avions abattus : 1428
    Date d'inscription : 19/12/2009
    Age : 67
    Localisation : Tergnier

    Un stampe SV 4 en construction Empty Re: Un stampe SV 4 en construction

    Message par JPV Jeu 16 Fév 2023 - 17:25

    La confection du stabilisateur ne pose pas de problème de construction, sauf lorsque à l’impression, on oublie de vérifier l'échelle !Un stampe SV 4 en construction 3282021089  
    En réalité ce n'est pas 0,83m pour le stab mais 0,93 m ce qui fait une différence ! Un stampe SV 4 en construction 4258015104
    Un stampe SV 4 en construction Img_1776
    On voit sous le stab le dessin qui n'est pas au côtes (1/9 pour 1) Un stampe SV 4 en construction 3282021089
    Un stampe SV 4 en construction Img_1777
    En ce qui concerne la pose sur le fuselage tout est sous contrôle ! Un stampe SV 4 en construction 2611293715
    Un stampe SV 4 en construction Img_1778
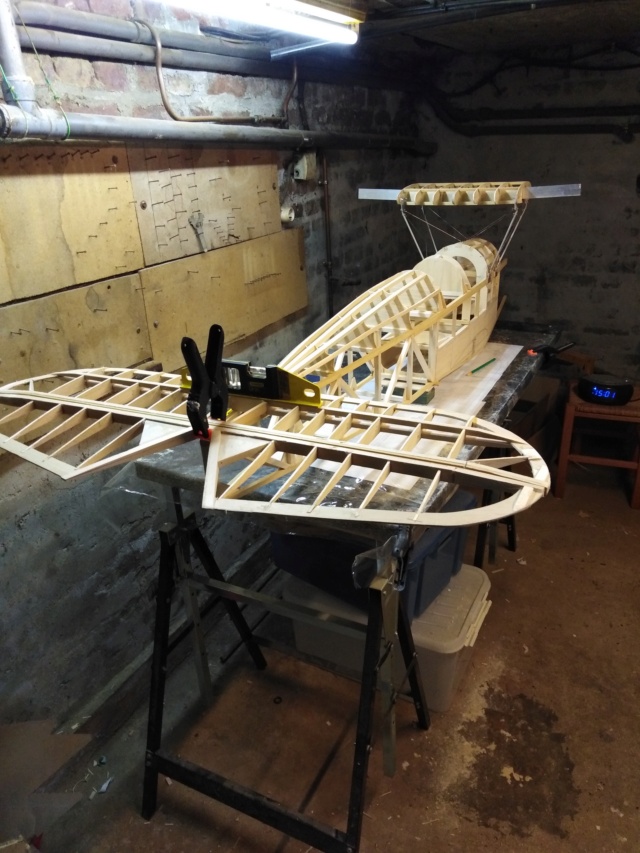
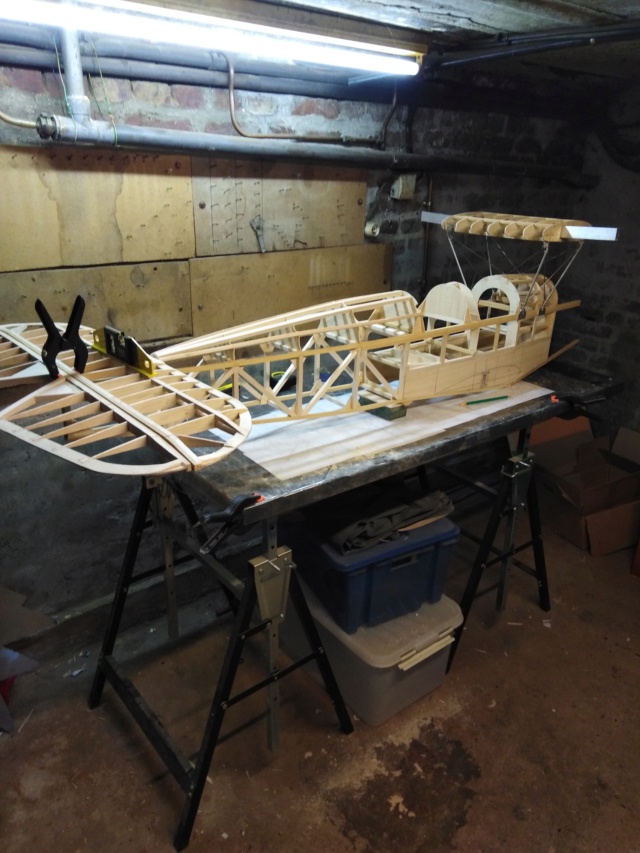
    Fuselage calé de niveau dans tous les axes, le stabilisateur est conforme au prévisions ! Un stampe SV 4 en construction 3369208113
    Un stampe SV 4 en construction Img_1779
    Il reste le système de réglage d'incidence fin à monter ainsi que la dérive à construire ! Un stampe SV 4 en construction 981361244
    Un stampe SV 4 en construction Img_1780
    Pas à dire ça commence à imposer ! Un stampe SV 4 en construction 1512217045
    Un stampe SV 4 en construction 1900122996
    JPV
    JPV
    Modérateur
    Modérateur


    Messages : 1424
    avions abattus : 1428
    Date d'inscription : 19/12/2009
    Age : 67
    Localisation : Tergnier

    Un stampe SV 4 en construction Empty Re: Un stampe SV 4 en construction

    Message par JPV Ven 17 Fév 2023 - 17:07

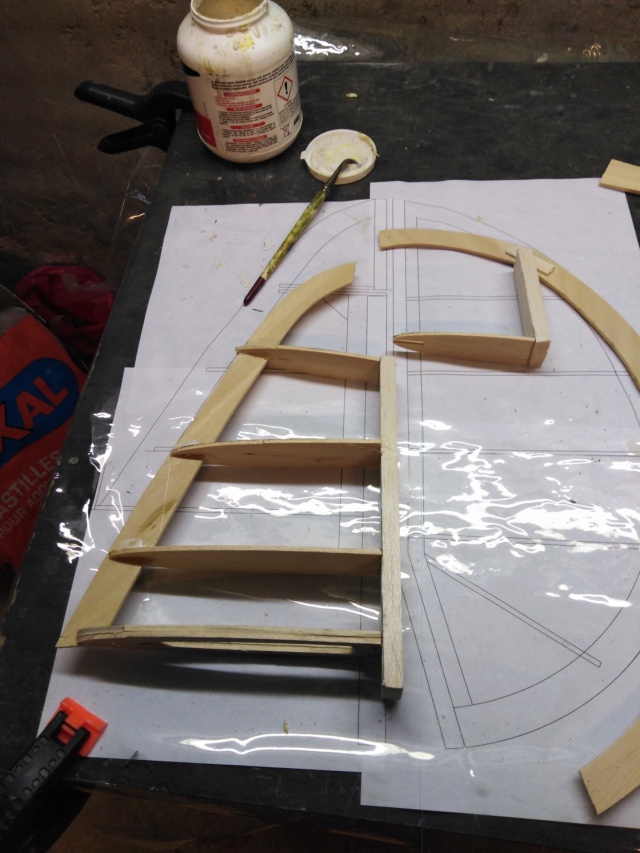
    C'est parti pour la construction de la dérive ! Un stampe SV 4 en construction 2611293715
    encore un beau morceau ! Un stampe SV 4 en construction 2611293715 [/center]
    Un stampe SV 4 en construction Img_1782
    Sortie du plan cette fois à l'échelle exacte ! Un stampe SV 4 en construction 991229809
     
    Un stampe SV 4 en construction Img_1784
    Traçage des nervures sur du balsa de 3 mm Un stampe SV 4 en construction 3369208113
    Un stampe SV 4 en construction Img_1783
    Premier collages ! Un stampe SV 4 en construction 3369208113
    JPV
    JPV
    Modérateur
    Modérateur


    Messages : 1424
    avions abattus : 1428
    Date d'inscription : 19/12/2009
    Age : 67
    Localisation : Tergnier

    Un stampe SV 4 en construction Empty Re: Un stampe SV 4 en construction

    Message par JPV Dim 19 Fév 2023 - 16:14

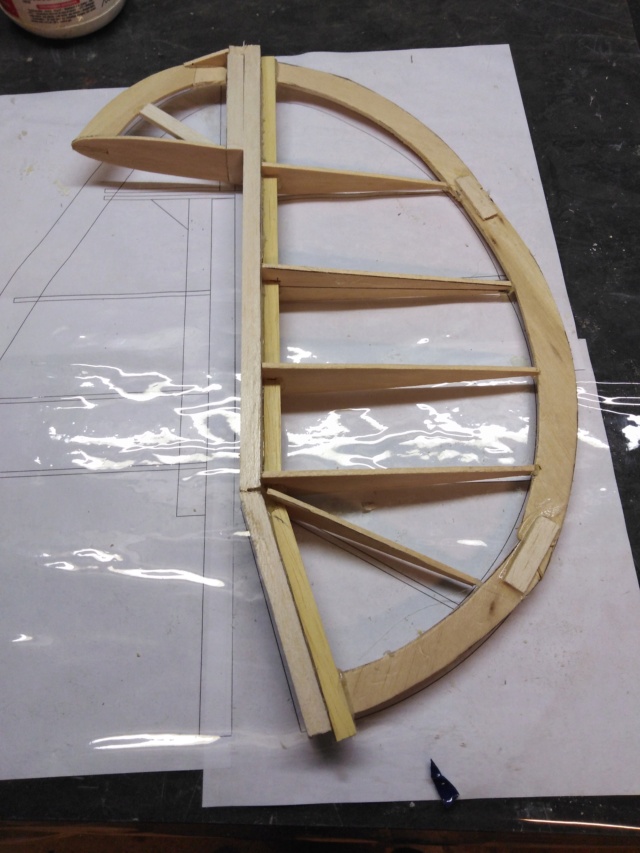
    La dérive est renforcée pour transmettre les efforts  à la roulette de queue ! Un stampe SV 4 en construction 981361244 [/center]
    Un stampe SV 4 en construction Img_1785
    Chapeau de dérive monté ! Un stampe SV 4 en construction 2611293715
    Un stampe SV 4 en construction Img_1788
    Le bord de fuite est taillé dans du balsa de 3 mm rabouté et renforcé aux endroits des collages (pas esthétique, mais efficace et cela ne se verra pas sous l'entoilage ) Un stampe SV 4 en construction 2611293715  
    Un stampe SV 4 en construction Img_1787
    Dérive renforcée ! Un stampe SV 4 en construction 3369208113
    Un stampe SV 4 en construction Img_1786
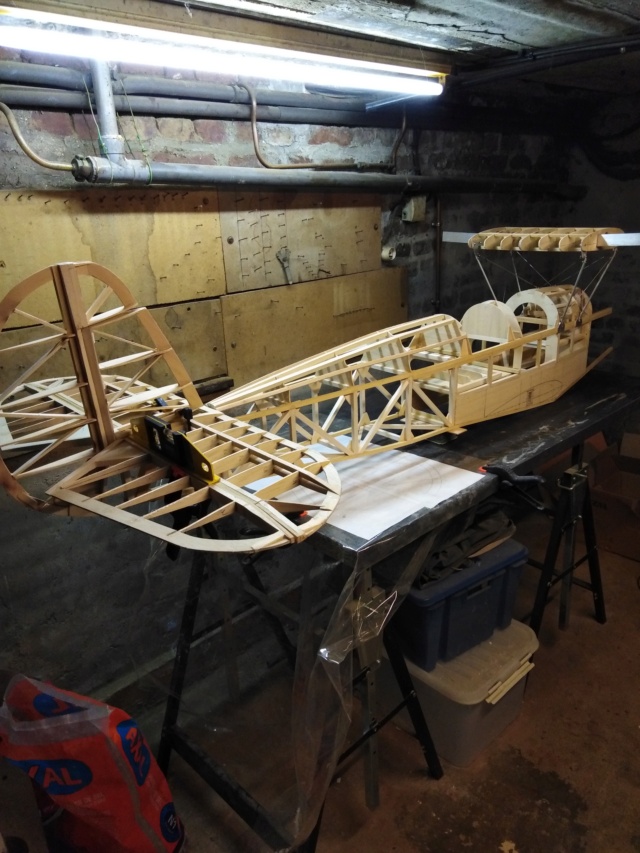
    Test de montage à blanc !
    Un stampe SV 4 en construction Img_1790
    Perpendicularité vérifiée ! Un stampe SV 4 en construction 981361244
    Un stampe SV 4 en construction Img_1789
    Horizontalité parfaite ! Un stampe SV 4 en construction 3369208113
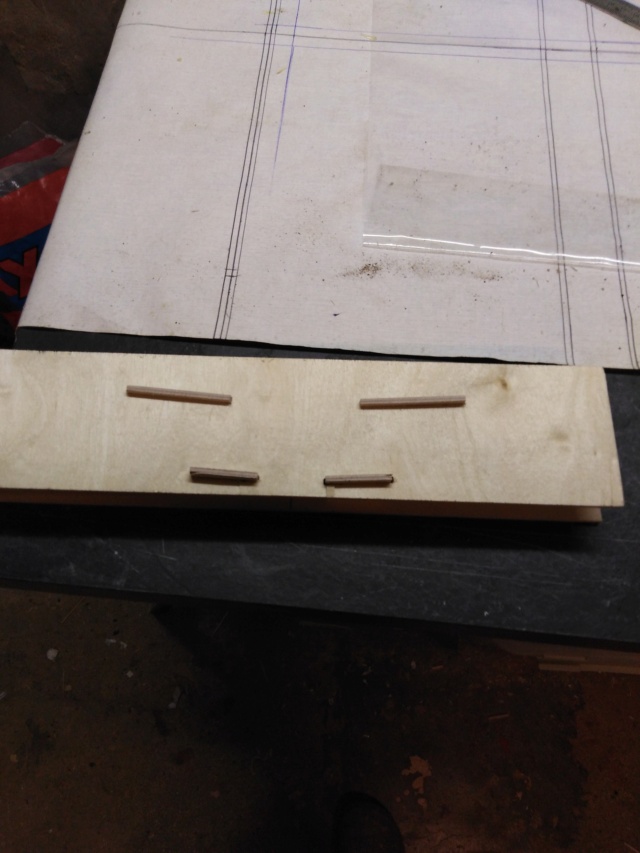
    Demain les ferrures de fixation et de réglage ! :respect:
    JPV
    JPV
    Modérateur
    Modérateur


    Messages : 1424
    avions abattus : 1428
    Date d'inscription : 19/12/2009
    Age : 67
    Localisation : Tergnier

    Un stampe SV 4 en construction Empty Re: Un stampe SV 4 en construction

    Message par JPV Dim 26 Fév 2023 - 15:55

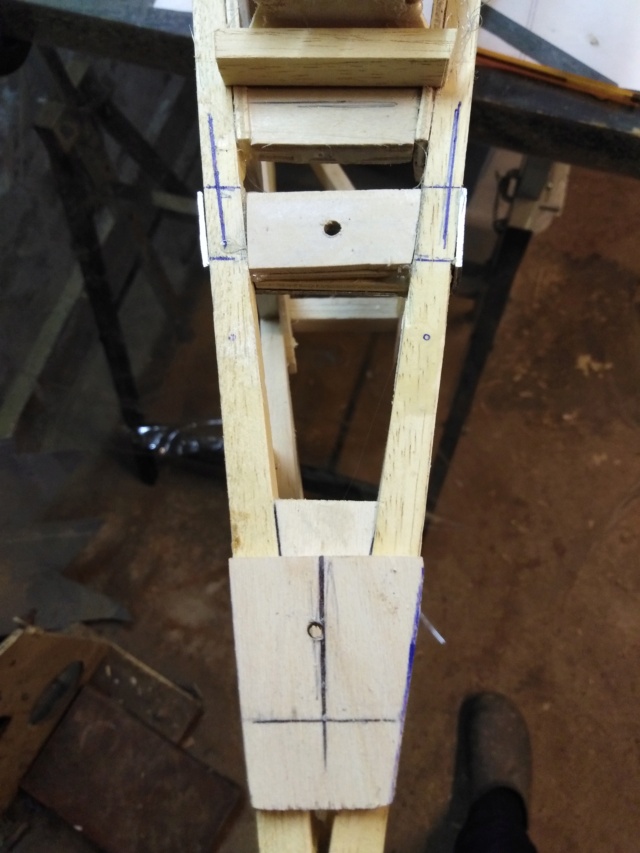
    Pose des ferrures de fixation du stabilisateur ! Un stampe SV 4 en construction 3369208113
    Si au départ j'avais prévu un réglage fin de l'incidence du stabilisateur à l'aide d'un système vis écrou, celui-ci est remis en cause faute de place pour le fixer ! Un stampe SV 4 en construction 1684196229
    En conclusion on fera simple ! Un stampe SV 4 en construction 981361244
    Un stampe SV 4 en construction Img_1791
     
    On commence par les ferrures (qui sont en alu) percées et taraudées à m3 ! Un stampe SV 4 en construction 2611293715
    Un stampe SV 4 en construction Img_1794
    Sur le fuselage sont collées des supports percé à 3 mm sur lesquels se fixera le stabilisateur! Un stampe SV 4 en construction 981361244
    Un stampe SV 4 en construction Img_1793
    Un cavalier vient renforcer la fixation ! Un stampe SV 4 en construction 2980765045
    Un stampe SV 4 en construction Img_1792
    Il suffit juste d'un tournevis adapté pour serrer l'ensemble Un stampe SV 4 en construction 2611293715
    Un stampe SV 4 en construction Img_1795
    On peut remarquer les 2 équerres filetées m 3 fixées sur les longerons du stabilisateur qui servent à recevoir les vis de fixation ! Un stampe SV 4 en construction 2611293715
    Un stampe SV 4 en construction Img_1796
    Confection du poste de pilotage en balsa de 1,5 mm  Un stampe SV 4 en construction 3369208113
    Un stampe SV 4 en construction Img_1797
    Le tout en cours de séchage ! Un stampe SV 4 en construction 3369208113
    Un stampe SV 4 en construction Img_1798
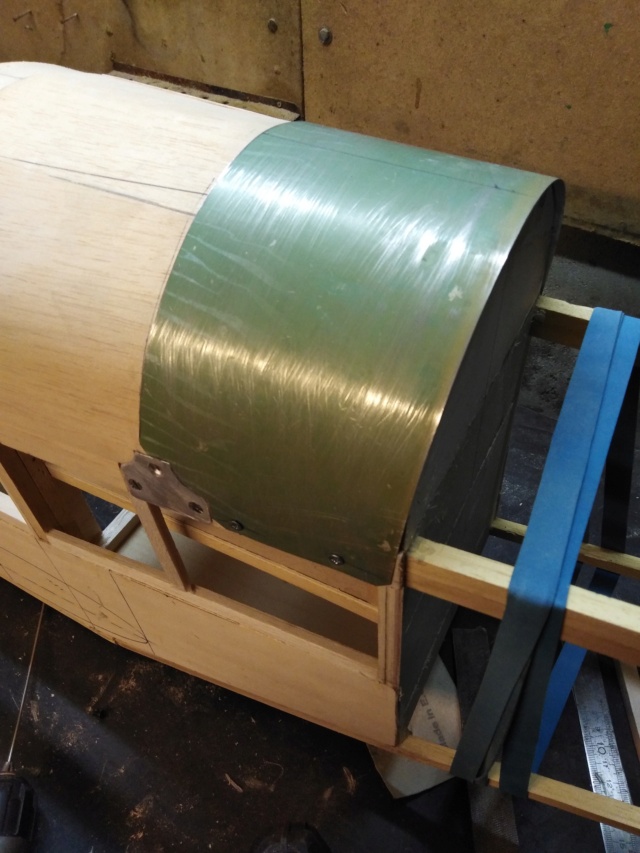
    Montage du capot amovible pour accés aux durites de réservoir ! Un stampe SV 4 en construction 3369208113  

    Fixation de la commande de profondeur ! Un stampe SV 4 en construction 3369208113
    Un stampe SV 4 en construction Img_1800
    La commande de profondeur est confectionnée dans du tube alu de 6x8 dans lequel coulisse une autre tige de 4x6 percée de trous de réglage ! Un stampe SV 4 en construction 1090871961
    Un stampe SV 4 en construction Img_1799
    Une tige fileté m3 est collée et sertie en bout et comporte une chape acier m3 ! Un stampe SV 4 en construction 3833087828
    Un stampe SV 4 en construction Img_1801
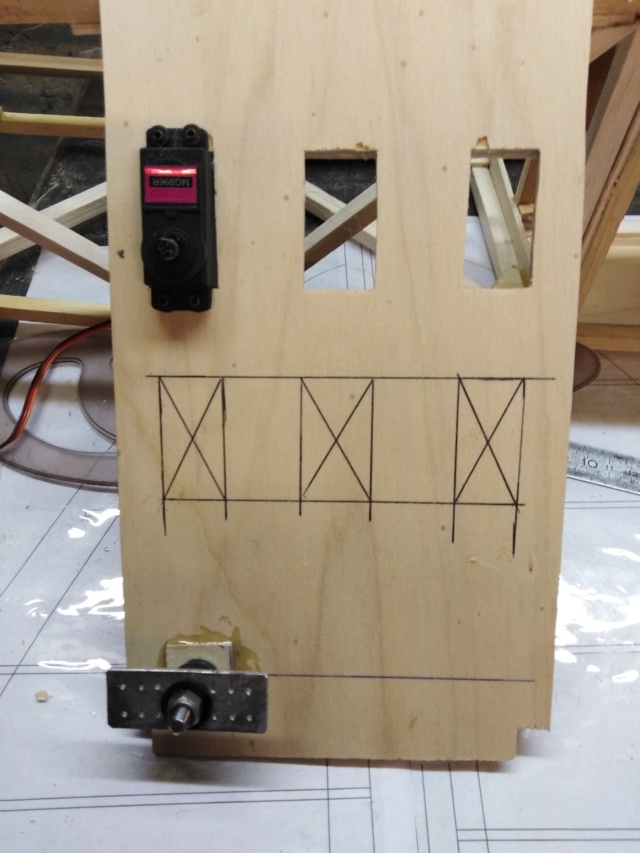
    Un servo commande de 15 kgs est positionné sur la platine ! Un stampe SV 4 en construction 1090871961
    Un stampe SV 4 en construction Img_1802
    Les biellettes de commandes aller retour sont installées sur le relais de la profondeur !(le réglage des débattements peut être augmentés au cas ou ! Un stampe SV 4 en construction 4258015104
    Un stampe SV 4 en construction Img_1804
    La platine est repositionnée pour mesure la longueur de la commande de profondeur ! Un stampe SV 4 en construction 1512217045
    Un stampe SV 4 en construction Img_1803
    Détail du guignol de profondeur qui est une vis m 3  en 8.8 monté sur  demi coquille en tube alu de 8 mm, ! Un stampe SV 4 en construction 3369208113
    Petite astuce ! Un stampe SV 4 en construction 2611293715
    J'avais oublié de percer la platine des servos, j'ai donc rusé pour faire les avants trous de fixation ! Un stampe SV 4 en construction 2966747885
    Un stampe SV 4 en construction Img_1805
    Pas de forets adéquate assez longs pour percer ! Un stampe SV 4 en construction 3282021089 On remplace par une chute de corde à piano ! Un stampe SV 4 en construction 1684196229
    Un stampe SV 4 en construction Img_1807
    Un plat est taillé à la pointe ! Un stampe SV 4 en construction 981361244
    Un stampe SV 4 en construction Img_1806
    Suffisant pour percer les trous ! Un stampe SV 4 en construction 3805079663
    Un stampe SV 4 en construction Img_1808
    Installation du tube de commande ! Un stampe SV 4 en construction 2611293715
    Un stampe SV 4 en construction Img_1810
    Montage du palier avant anti fluage de la commande ! Un stampe SV 4 en construction 2611293715
    Un stampe SV 4 en construction Img_1809
    Montage de l'arrière ! Un stampe SV 4 en construction 981361244
    Un stampe SV 4 en construction Img_1811
    Vue de la commande arrière ! Un stampe SV 4 en construction 3369208113
    JPV
    JPV
    Modérateur
    Modérateur


    Messages : 1424
    avions abattus : 1428
    Date d'inscription : 19/12/2009
    Age : 67
    Localisation : Tergnier

    Un stampe SV 4 en construction Empty Re: Un stampe SV 4 en construction

    Message par JPV Mar 28 Fév 2023 - 16:42

    Vingt fois sur le métier remettez votre ouvrage.  Un stampe SV 4 en construction 3369208113
    Un stampe SV 4 en construction Img_1812
    On termine de monter les raidisseurs hauts ! Un stampe SV 4 en construction 1512217045  
    Un stampe SV 4 en construction Img_1813
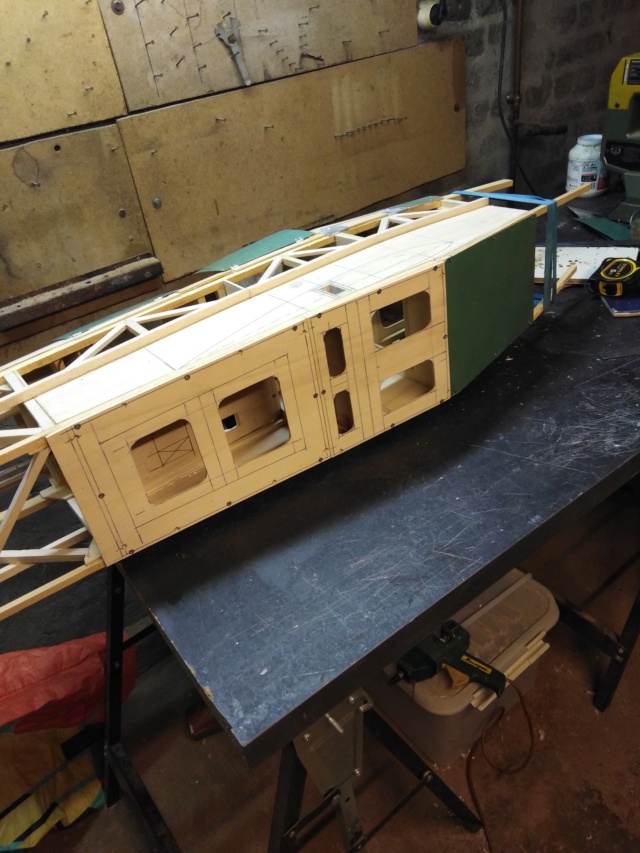
    On confectionne ensuite les trappes de visite (qui seront allégées par la suite ) Un stampe SV 4 en construction 2980765045
    Un stampe SV 4 en construction Img_1815
    Puis on passe à la pesée de l'engin juste pour voir ! Un stampe SV 4 en construction 1512217045
    Un stampe SV 4 en construction Img_1814
    C'est pour l'instant dans l'ordre des choses, le devis de poids étant de 9 kgs et la charge alaire prévue pour 70 grs/dm²Un stampe SV 4 en construction 3369208113  
    Un stampe SV 4 en construction Img_1816
    Voilà les trappes allégées et montée, Celle de l'avant est en tôle offset pour les fuites éventuelles d'essence ! Un stampe SV 4 en construction 4258015104
    Un stampe SV 4 en construction Img_1817
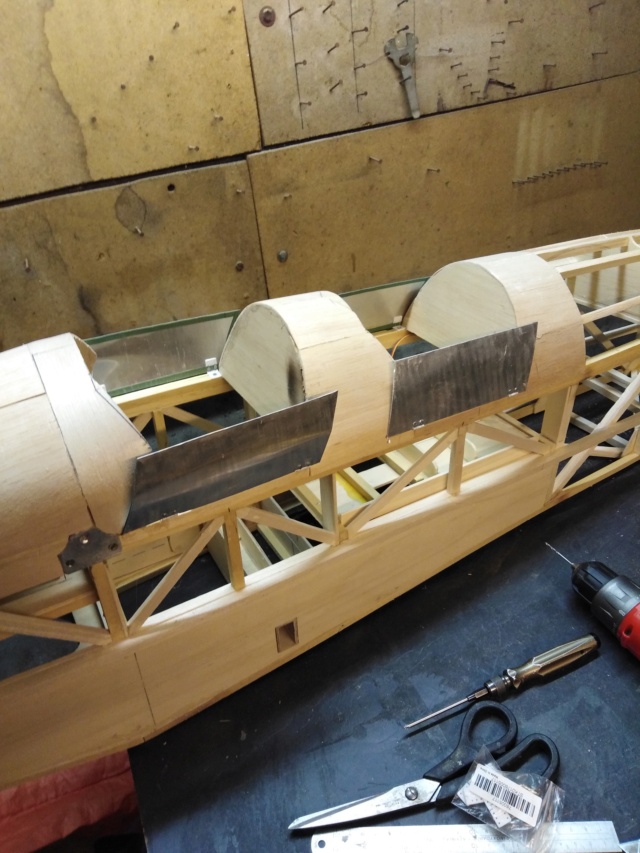
    Confection des petites portes du cockpit ! Un stampe SV 4 en construction 981361244
    Un stampe SV 4 en construction Img_1820
    Elles ont plus larges que la normale juste pour quelles puissent tenir fermement ! Un stampe SV 4 en construction 2980765045
    Un stampe SV 4 en construction Img_1821
    Attention il y a droite et gauche (je me suis trompé sur ce coup là et on voit la différence !) Un stampe SV 4 en construction 3282021089
    Un stampe SV 4 en construction Img_1819
    Pour les confectionner ,il faut d'abord les tracer avec une petite augmentation de 5 mm par rapport à l'origine . Un stampe SV 4 en construction 2611293715
    Un stampe SV 4 en construction Img_1824
    Ensuite poser les portes suivant le tracé, et plier au doigt ! Un stampe SV 4 en construction 3369208113
    Un stampe SV 4 en construction Img_1823
    A l'aide d'un maillet de bois dresser les faces pliées !(uniquement avec un maillet de bois ) Un stampe SV 4 en construction 2611293715
    Un stampe SV 4 en construction Img_1822
    Puis rabattre ensuite le pli avec le maillet !(moi, j'ai intégré les charnières dans le pli puis les aient riveté )
    Reste maintenant, à imaginer les fermetures Un stampe SV 4 en construction 1900122996

    Contenu sponsorisé


    Un stampe SV 4 en construction Empty Re: Un stampe SV 4 en construction

    Message par Contenu sponsorisé


      La date/heure actuelle est Sam 27 Avr 2024 - 18:12